Microsoft 365 automatically sets up DKIM for its initial ‘onmicrosoft.com’ domains. That means you don’t need to do anything to set up DKIM for any initial domain names (for example, litware.onmicrosoft.com). For more information about domains, see Domains FAQ.
DKIM is one of the trio of Authentication methods (SPF, DKIM and DMARC) that help prevent attackers from sending messages that look like they come from your domain.
DKIM lets you add a digital signature to outbound email messages in the message header. When you configure DKIM, you authorize your domain to associate, or sign, its name to an email message using cryptographic authentication. Email systems that get email from your domain can use this digital signature to help verify whether incoming email is legitimate.
In basic, a private key encrypts the header in a domain’s outgoing email. The public key is published in the domain’s DNS records, and receiving servers can use that key to decode the signature. DKIM verification helps the receiving servers confirm the mail is really coming from your domain and not someone spoofing your domain.
Tip
You can choose to do nothing about DKIM for your custom domain too. If you don’t set up DKIM for your custom domain, Microsoft 365 creates a private and public key pair, enables DKIM signing, and then configures the Microsoft 365 default policy for your custom domain.
Microsoft-365’s built-in DKIM configuration is sufficient coverage for most customers. However, you should manually configure DKIM for your custom domain in the following circumstances:
- You have more than one custom domain in Microsoft 365
- You’re going to set up DMARC too (recommended)
- You want control over your private key
- You want to customize your CNAME records
- You want to set up DKIM keys for email originating out of a third-party domain, for example, if you use a third-party bulk mailer.
How DKIM works better than SPF alone to prevent malicious spoofing
SPF adds information to a message envelope but DKIM encrypts a signature within the message header. When you forward a message, portions of that message’s envelope can be stripped away by the forwarding server. Since the digital signature stays with the email message because it’s part of the email header, DKIM works even when a message has been forwarded as shown in the following example.

In this example, if you had only published an SPF TXT record for your domain, the recipient’s mail server could have marked your email as spam and generated a false positive result. The addition of DKIM in this scenario reduces false positive spam reporting. Because DKIM relies on public key cryptography to authenticate and not just IP addresses, DKIM is considered a much stronger form of authentication than SPF. We recommend using both SPF and DKIM, as well as DMARC in your deployment.
Tip
DKIM uses a private key to insert an encrypted signature into the message headers. The signing domain, or outbound domain, is inserted as the value of the d= field in the header. The verifying domain, or recipient’s domain, then uses the d= field to look up the public key from DNS, and authenticate the message. If the message is verified, the DKIM check passes.
Steps to Create, enable and disable DKIM from Microsoft 365 Defender portal
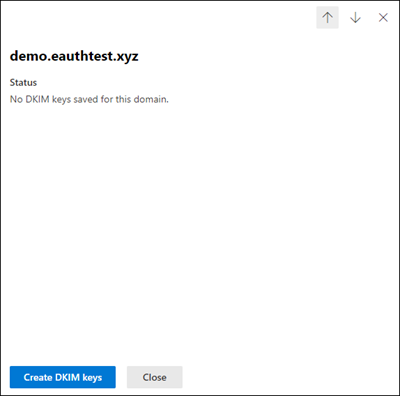
All the accepted domains of your tenant will be shown in the Microsoft 365 Defender portal under the DKIM page. If you do not see it, add your accepted domain from domains page. Once your domain is added, follow the steps as shown below to configure DKIM.
Step 1: Click on the domain you wish to configure DKIM on DKIM page (https://security.microsoft.com/dkimv2 or https://protection.office.com/dkimv2).

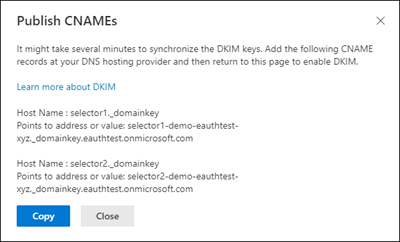
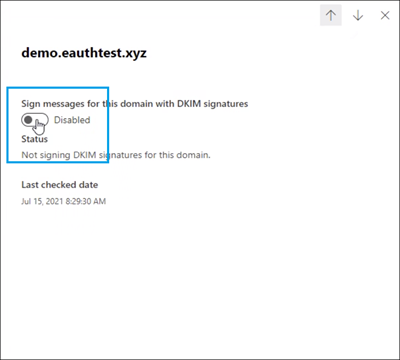
Step 2: Slide the toggle to Enable. You will see a pop-up window stating that you need to add CNAME records.

Step 3: Copy the CNAMES shown in the pop up window

Step 4: Publish the copied CNAME records to your DNS service provider.
On your DNS provider’s website, add CNAME records for DKIM that you want to enable. Make sure that the fields are set to the following values for each:
textCopy
Record Type: CNAME (Alias)
> Host: Paste the values you copy from DKIM page.
Points to address: Copy the value from DKIM page.
TTL: 3600 (or your provider default)
Step 5: Return to DKIM page to enable DKIM.

If you see CNAME record doesn’t exist error, it might be due to:
- Synchronization with DNS server, which might take few seconds to hours, if the problem persists repeat the steps again
- Check for any copy paste errors, like additional space or tabs etc.
If you wish to disable DKIM, toggle back to disable mode.
Ref: https://learn.microsoft.com/en-us/microsoft-365/security/office-365-security/use-dkim-to-validate-outbound-email?view=o365-worldwide