Note: If your device/service supports SHA256 and DH group 14, it is recommended to use these settings instead.
Configuring the tunnel at the FortiGate Management Interface
- Open the FortiGate Management Interface
- In the left panel, select VPN, then IPsec Tunnels, and select Create New
- In the VPN Creation Wizard window set the Name to NordLayer (or any other name you desire), the Template Type to Custom tab, and select Next
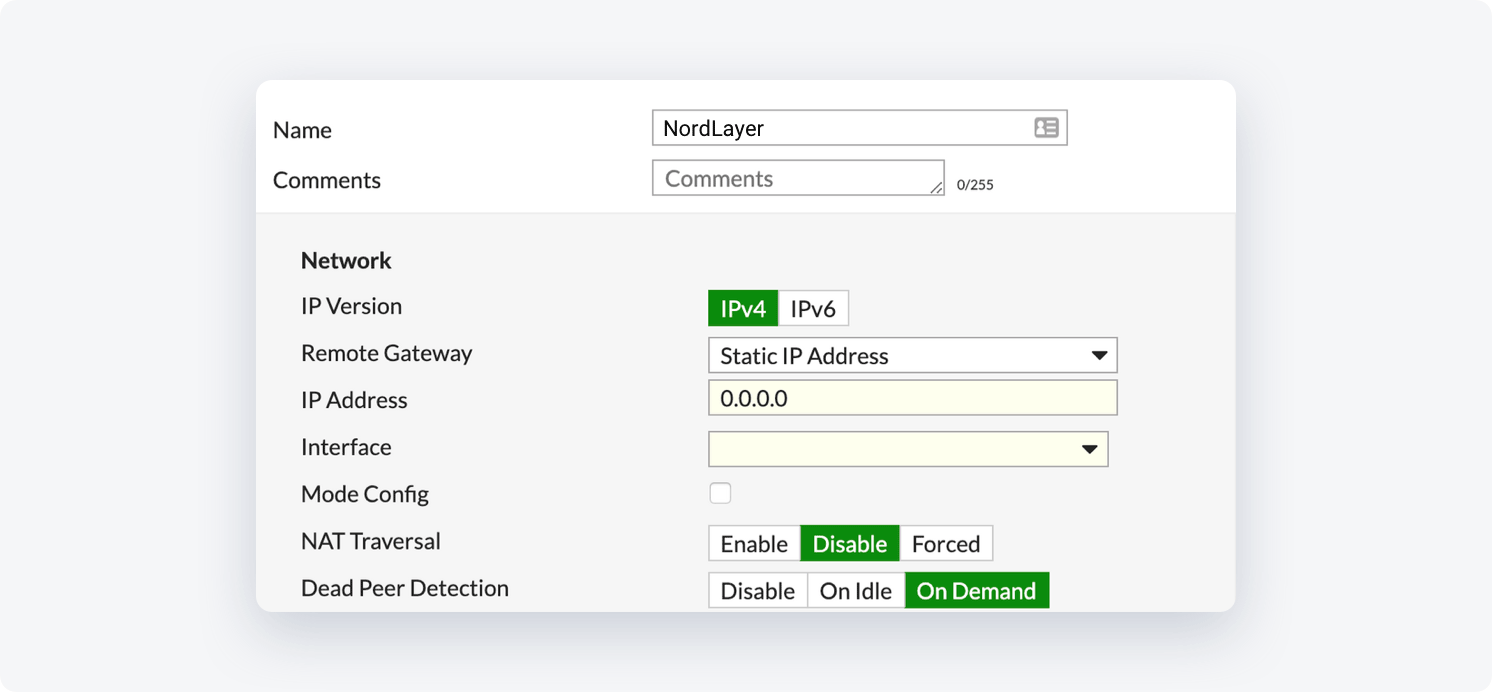
- Fill in the following information:
Network Section:
- IP Version: IPv4
- Remote Gateway: Static IP Address
- IP Address: Insert the IP of your NordLayer dedicated server
- Interface: select your WAN interface
- Mode Config: unchecked
- NAT Traversal: Disable
- Dead Peer Detection: On-Demand
Authentication section:
- Method: Pre-shared Key
- Pre-shared Key: Insert the generated Shared Key (we will also need this value on our end)
- IKE Version: 2
- Mode: Main (ID protection)
Phase 1 Proposal section:
- Encryption: AES256
- Authentication: SHA256
- Diffie-Hellman Group: 14
- Key Lifetime (seconds): 3600
- Local ID: leave blank
- XAUTH Section: leave disabled
Phase 2 Selectors (+Advanced) section:
- Name: NordLayer
- Local Address: Your Local network Subnet
- Remote Address: 10.6.0.0
- Enable Replay Detection: Checked
- Enable Perfect Forward Secrecy (PFS): Checked
- Diffie-Hellman Group: 14
- Encryption: AES256
- Authentication: SHA256
- Local Port: Checked
- Remote Port: Checked
- Protocol: Checked
- Key Lifetime: Seconds
- Seconds: 28800
Configuring firewall and static routing
It is necessary to add static routes from the NordLayer subnet (10.6.0.0/20) to the local network and from the local network to the NordLayer subnet (10.6.0.0/20) to the local network through the VPN tunnel gateway.
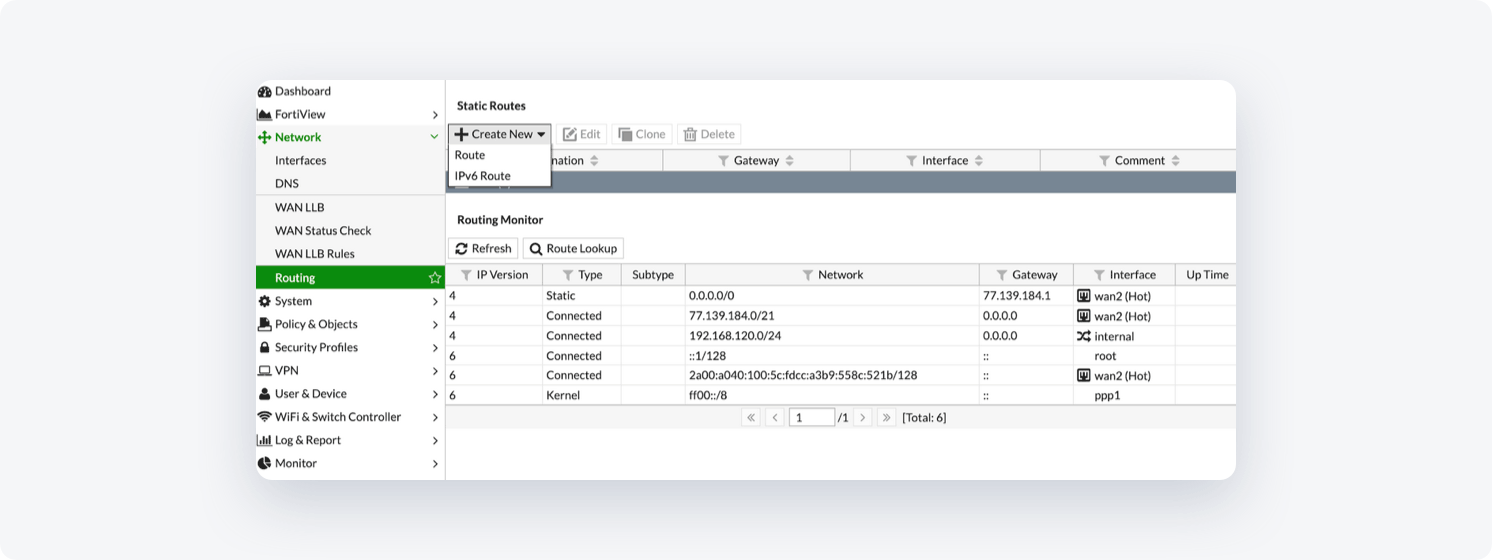
- Go to Network -> Routing -> Static Routes -> Create new -> Route
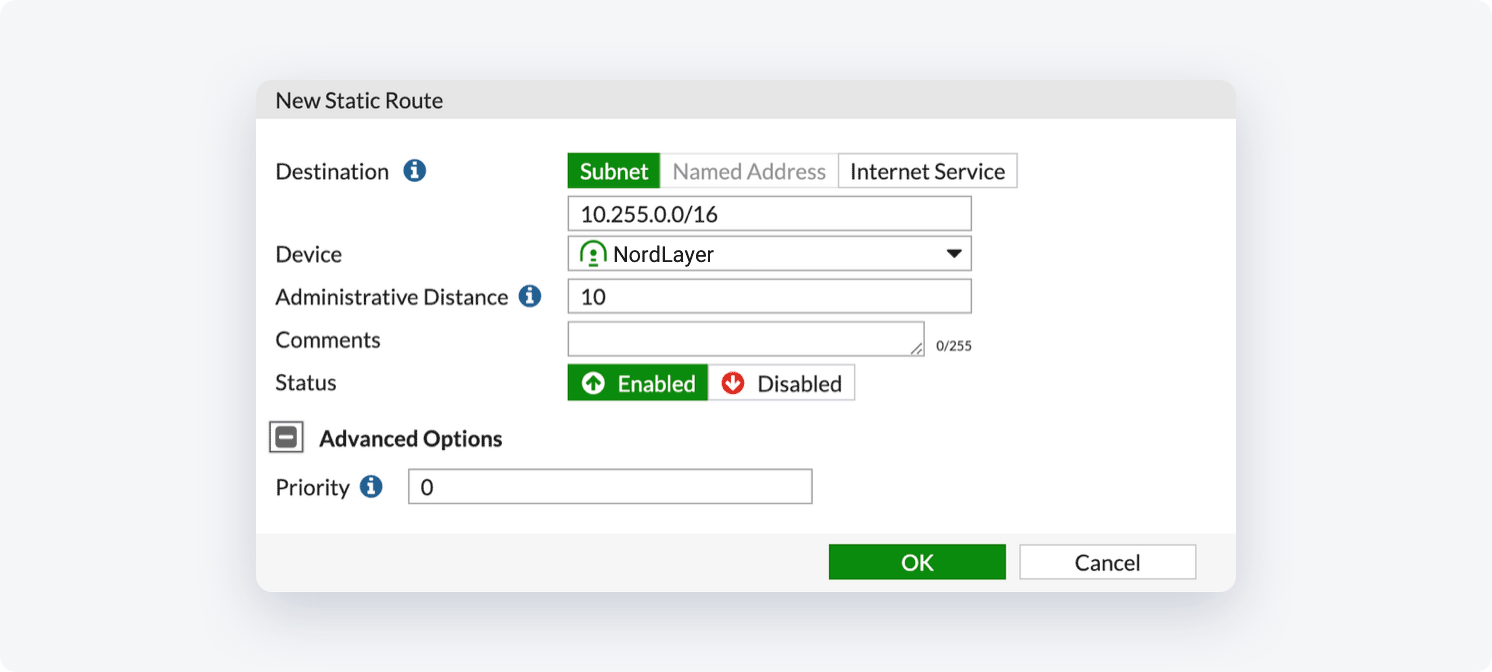
- Set Destination to 10.6.0.0/20 and the Device: NordLayer (or any other name you chose for the tunnel)
- Select OK
- It is necessary to add firewall rules to allow traffic from the NordLayer subnet (10.6.0.0/20) to your local network or services you desire
- Go to Policy & Objects -> IPv4 Policy and select Create New
- Fill in the following information:
- Name: NordLayer
- Incoming Interface: NordLayer
- Outgoing Interface: Your local network object
- Source: All
- Destination: All
- Schedule: Always
- Service: All
- NAT: Disabled
If any additional settings appear, leave them in their default status.
- Select OK
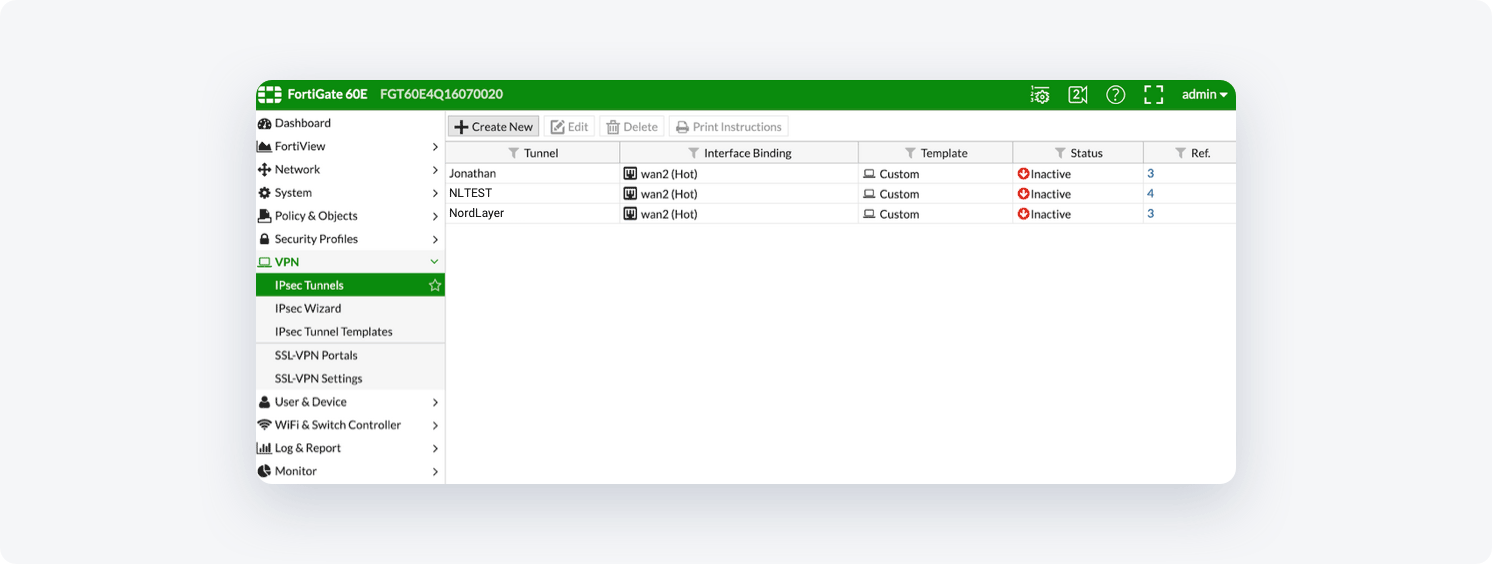
Make sure the tunnel is up
At the FortiGate Management Interface, go to VPN -> IPSec Tunnels. If the tunnel is up the line will appear in the table:

Ending note:
In order to finalize the site-to-site setup on our end, please provide these values via Site-to-site request from in the NordLayer Control Panel:
- Pre-shared key – you can generate it or we can provide it
- Encryption details (AES, SHA and DH group) – AES256, SHA256 and DH group 14 are recommended (also must support IKEv2)
- Remote gateway/router public IP (must be reachable while connected to the dedicated server)
- Remote subnet and mask (the subnet is used in your local network)
Ref: Setting up site-to-site on FortiGate – Site-to-site on-premises resources (nordlayer.com)