Dataflows are part of the Power BI service for a while now. More and more people are starting to benefit from it in multiple perspectives. The two most heard ones are re-use of data (and logic), but also isolate refreshes to avoid dependencies of refresh failures from different sources.
Same as for your data sources, you might have different workspaces setup in different stages of your DTAP development approach. In the past, I wrote a blog on how to work with a Multi-tier architecture and continuous delivery in Power BI. In this blog, I elaborate on setting up multiple workspaces for each stage of your DTAP approach.
Since we, as Power BI content developers, are rather lazy (or efficient, name it as you like), we don’t want to move all our content from one workspace to another manually. But how to handle this with dataflows since we don’t have a physical file which we can publish from one workspace to another? Let’s automate!
This time I’m not writing the blog alone, but co-authored with my colleague Ton Swart, who is an expert in automating stuff!
Not familiar with Dataflows yet? Take a look at the Microsoft documentation.
Extract the Dataflow definition manually
Dataflows can be easily built in the Power BI Service. Since the dataflow user interface isn’t as intuitive as Power BI desktop, I personally prefer to build the logic (Power Query) in Power BI desktop. After building, easily copy-paste the advanced editor code to a dataflow and you’re ready to go!
However, you want to avoid to copy-paste the full Power Query logic repeatedly to every workspace in your DTAP approach. Luckily there is a native option in Power BI which allows you to extract the dataflow definition to a JSON file. Follow the below steps to extract the dataflow logic
- Go to the workspace where your dataflow is stored
- Navigate through the dataflow section
- Click on the three dots of the dataflow you want to extract the logic from
- Click Export json

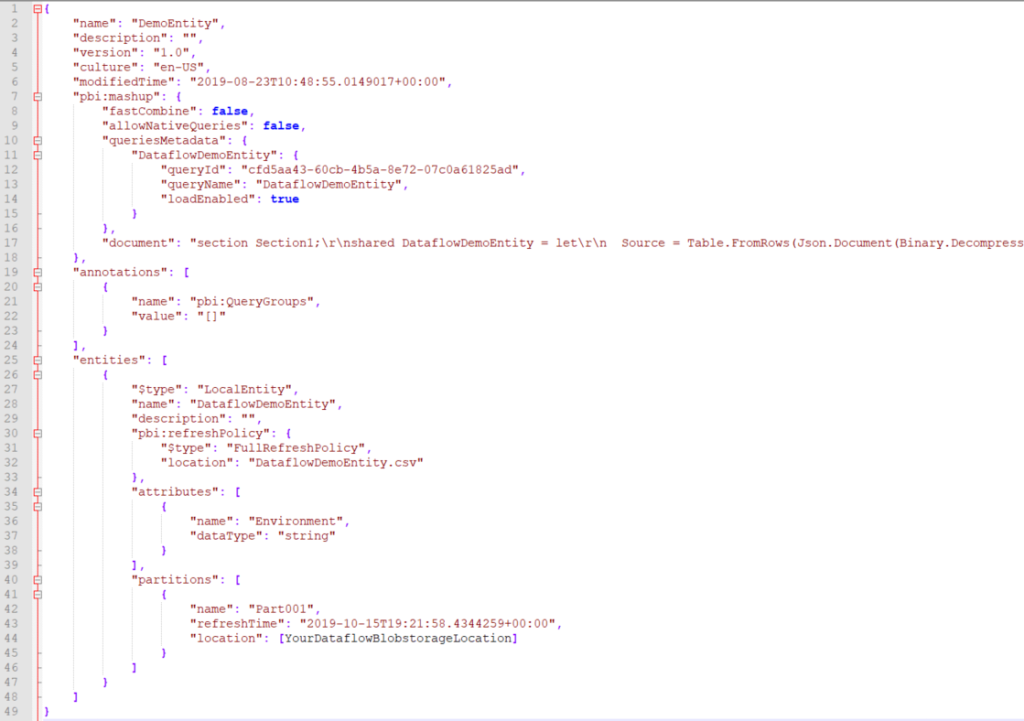
Looking at the extracted JSON, you will recognize that the Power Query code is included in the document section of the dataflow. Besides that, you may notice that there is a list of partitions in the bottom section of the JSON. Every partition represents a successful refresh of your dataflow and a stored dataset on a blob storage. The full location of the blobstorage is mentioned in the JSON as well. This location is not reachable unless your workspace is running on premium capacity and connected your own Data Lake storage gen2 as storage location for your dataflow.
Manually upload the json definition
After exporting the dataflow definition file, we want to move it to another workspace. Luckily, there is an option to import your dataflow definition manually into a new dataflow. As soon as we navigate through another workspace, we can easily apply the following steps:
- Navigate through your destination workspace
- Go to the dataflows section
- Click create, and click Dataflow
- Click the third option, Import Model
- Find the JSON file which you’ve saved when exporting the dataflow definition
- After successfully importing the JSON file, a notification at the right top will appear. Please click Edit Credentials. The credentials to access the underlying data source are not part of the JSON file and need to be entered again.

Automate with the Power BI REST API
Now, here it starts to become interesting. Let’s try to automate the manual steps to an automated process. To automate task in the Power BI service, we have to “talk” to the Power BI REST API. The Power BI REST API provides programmatic access to the report server catalog. For example, basic CRUD (Create, Read, Update and Delete) operations can be done on folders, reports, KPIs, data sources, datasets, refresh plans, subscriptions, etc.
We are using the “MicrosoftPowerBIMgmt” PowerShell module for communicating with the Power BI REST API. Forget the hassle of setting up the App registration within Azure Active Directory for API access, the Power BI PowerShell cmdlets take care of it for you. Just install and start using today!
Extract the Dataflow definition
To extract the Dataflow definition, we use the groups/{groupId}/dataflows/{dataflowId} API call. For this call we first have to figure out the “groupId” and “dataflowId“. So, we start with the groupId by connecting to the Power BI service and get the ID of the workspace “DP_DEMO_dev”:
Now, we have the groupId we can look for the dataflow definition “DemoEntity”. We’re getting all the dataflows from the workspace and filter the dataflow we are looking for. Because the dataflow call isn’t available as a cmdlet in the MicrosoftPowerBIMgmt module, we make use of the Invoke-PowerBIRestMethod that is available, to get all the dataflow definitions: 
With these steps, we have the groupId and the dataflowId. With that, we can finally extract the dataflow definition.
Import the Dataflow definition
Now, we extracted the dataflow JSON definition, we can re-use it to upload it to another workspace “DP_DEMO_acc”. Due to a small bug in the import REST API, we have to remove all the “partitions” properties from the JSON object before importing it to the new workspace. The manual import model in Dataflows does the stripping for you but the API does not. For importing the dataflow definition into the workspace we use the “Post Import In Group” API call. We format the request body with the dataflow definition and import it into the new workspace.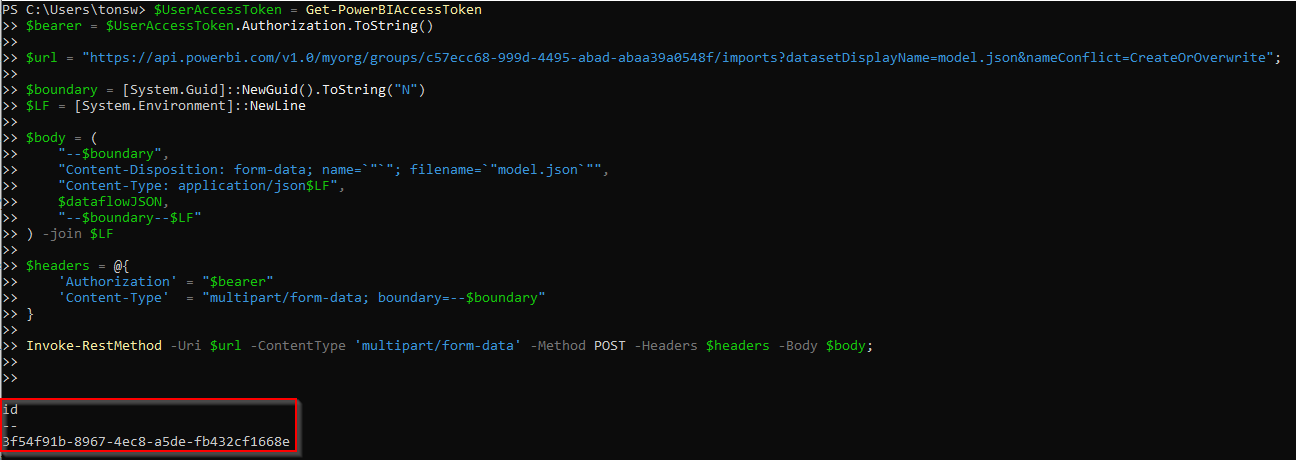
Wrapping things up
The result of the above described PowerShell script includes three parameters which needs to be filled to make this work for you.
- $SourceWorkspaceName = “[YourSourceWorkspaceName]“
- $DestinationWorkspaceName = “[YourDestinationWorkspaceName]“
- $DataflowName = “[YourDataflowName]“
As described above, these names will be used to lookup the corresponding IDs for further calling the APIs.
This approach to move your dataflows, helps you to professionalize your DTAP approach. Of course, you can move your dataflows manually as described above, but what about moving them automatically without doing manual tasks, or even make this part of your Azure DevOps deployment (blog on this topic coming soon!).
Ref: https://data-marc.com/2019/10/22/move-dataflows-across-workspaces-with-the-power-bi-rest-api/