How to Enable Offline Files in Windows 10 and Sync it?
Want to to keep offline files in sync between your computer and network servers? You can learn to enable offline files in Windows 10 and then sync it.
By Ivy
What are offline files?
Offline Files is a useful sync feature in Windows 7/8/10, which works with Sync Center. With the help of Sync Center, all the information ( called offlines files ) can be synced between computer and network servers and the network files and folders are kept available offline on your computer. The offline files is just a copy of your network files and folders saved on the computer.
Thus, you can access offline files even when you are not connected to the network and server if you enable offline files in Windows 10.
Why you should enable offline files in Windows 10?
1. Access network files or folders at any time.
If you want to access network files or folders at any time, especially when your computer is not connected to the network and server, you need to use Offline Files features.
2. Sync offline files between computer and network drive.
If you want to sync files with offline files folder or Sync Center, the first thing is to enable offline files and activate Offline Files folder. Offline Files Folder is used to keep offline files in sync between your computer and network drive.
How to enable offline files in Windows 10?
Usually, you should create a shared folder to save the network files and folders. If you want to make it always offline, the first step is to map the network drive to local computer. And then you are allowed to turn on offline files in Windows 10.
Step 1. Sync network drive to local drive
1. Access the shared folder on the network drive. You can press Win + R to summon the Run window, then type two backslashes and IP address or hostname to connect your network drive. Once your connect to the server, you will see the shared folder.
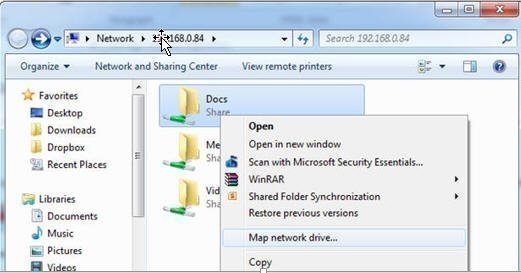
2. Right-click the shared folders, then choose Map network drive from the context menu.
3. Now, you can go to the offline files folder or its subfolder, right-click it and select Always available offline from the context menu.

4.Wait for the final result after you receive a message, saying “ your files will be available offline”. When this step finish, you can disconnect from the network and see your offline files from the mapped network drive.

Note: In the mapped network drive, You will see a list of folders, which have already been cached by Offline Files folder. But you can only access files available offline. If you try to open a folder which is not available offline, there will be nothing inside unless you connect to the network again.
Step 2. How to turn on offline files in Windows 10?
To turn on offline files in Windows 10, there are 3 common used ways. You can try one of them in the following.
Method 1: Configure offline files in Windows 10 by Sync Center
1. Go to Control Panel, switch its view to “Large icon” or “Small icons”, then find Sync Center and open it.
2. Click Manage offline files at the left panel and then you will see an Offline Files window.
3. Enable offline files and activate its folder. You can click Enable offline files under the Gerneral tab and restart your computer to activate Offline Files folder. If you do not restart your computer, offline files folder will not be saved on your computer.
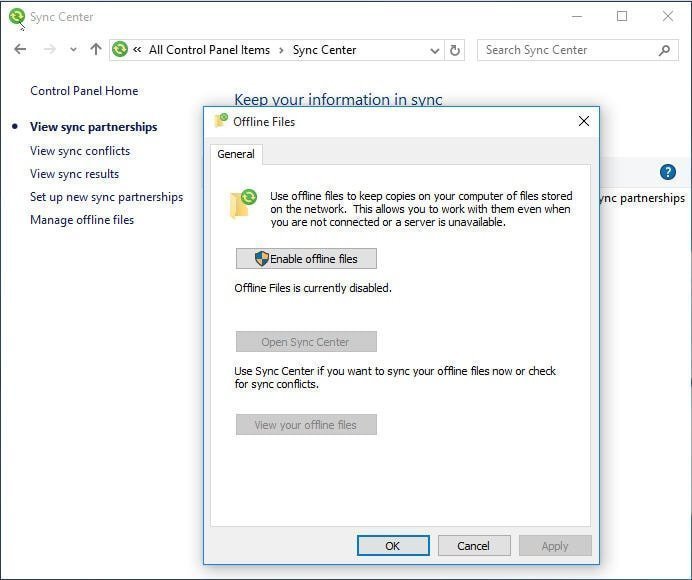
Note: After you enable and activate offline files, you will see Disable offline files option when your access Offline Files again.If you want to disable offline files in Windows 10, you just need to move your finger and click Disable offline files. Please remember to restart your computer to make changes available.
Method 2: Enable offline files in Windows 10 using GPO
1.Type group policy in the search box and then select group policy editor from the start menu list.
2. Expand Computer Configuration > Administrator templates > Network > Offline Files in order, find and double-click Allow or Disallow the use of Offline Files feature, tick Enabled and then click Apply and OK to exit this window.
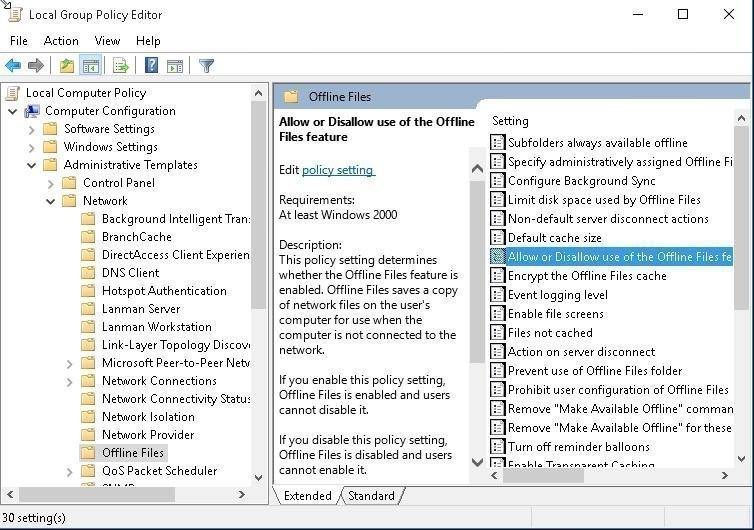
3. close local group policy, and then go to Sync Center and see if Offline Files is enabled.
Method 3: Enable Offline Files in Windows 10 using Registry
1. Type registry in the search box, select and open it. Then, go to the following key, right-click on the blank, select new and DWORD (32-bit) Value, set its name as Start and value to 1.
HKEY_LOCAL_MACHINE\SYSTEM\CurrentControlSet\Services\CSC

2. Now go to the key below and set the Start value to 2.
HKEY_LOCAL_MACHINE\SYSTEM\CurrentControlSet\Services\CscService
3. Restart your computer and make changes available.
If you want to enable offline files in Windows 7/8, you can follow the steps above. It’s very similar.
How to sync offline files in Windows 10?
About offline files sync in Windows 10, you have two options, including syncing offline files manually and automatically. Detailed steps are below.
Method 1: Sync offline files manually
Step 1. Access the mapped network drive. You can go to File Explore > This PC > network locations, then select the mapped network drive created in advance.
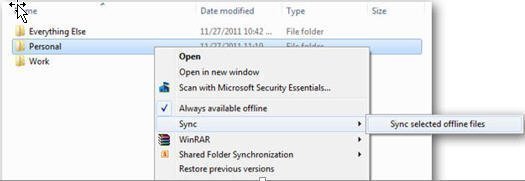
Step 2. Sync offline files.You canright-click folders which contain offline files, then select Sync > Sync selected offline files.
Method 2: Sync files automatically
Step 1. Enter into Sync Center. You can type Sync Center in the search box, then select it from start menu list.
Step 2. Access the mapped network drive. You can click View sync partnerships link in the left pane, then double-click the mapped network drive.
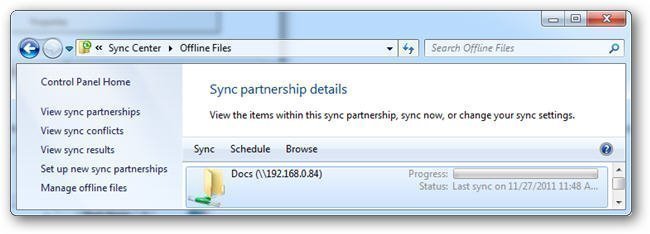
Step 3. Select the folder you want to sync on a regular basis, then pitch on Schedule button on the menu bar. At last, follow the prompt to finish the rest of steps.
Conflicts in syncing files – how to fix?
If some certain files does not sync, you may see conflicts files in Offline Files. It occurs when you edit file offline and somebody else edit the same file on your network. After that, these files will not be synced and marked as conflicts. Don’t worry about it. It’s very easy to fix.
Step 1. Go to Sync Center, click View sync conflicts on the left panel and then you will see a list of conflict files.
Step 2. Right-click the files and click View option. Now, you can choose to keep the version that you created while you were away, keep the version on the server that someone else edited while you were away or keep both versions and rename the one that you created.
Step 3. Sync files again.
An easier way to sync files
Offline files folder and Sync Center on your computer can help you sync files both manually and automatically. However, the files are only synced between computers and network drive. And Offline Files may not work as it should. For example, some of your files may not be synced owing to conflicts. Want an easier way, I recommend you sync files with file sync software AOMEI Backupper.
File sync software: AOMEI Backupper
AOMEI Backupper is a very easy-to-use file sync software, even for a beginner. With it, you can sync files to a network drive, internal hard drive, external storage device like USB flash drive, OneDrive, etc.
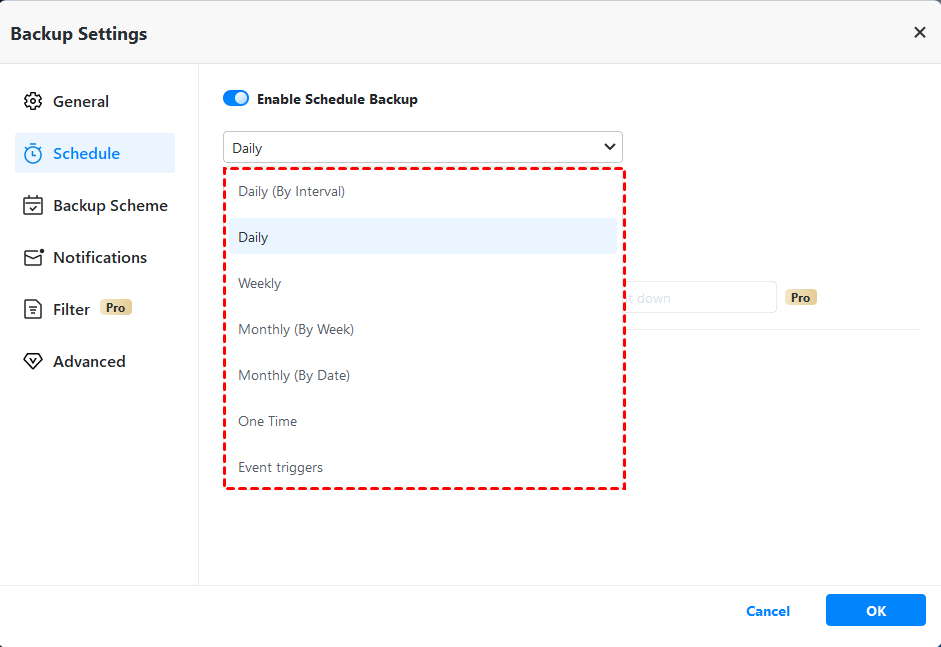
Besides, you can enjoy a more useful feature. You can get an email notification and ensure if your operation is completed successfully. You can sync files at a given time and date, including day by day, week by week, month by month. Also, you can sync files in real-time. That’s to say, your files will be monitored and if there are some files modified or new files added to this folder, this software will sync it to the destination path automatically.
AOMEI Backupper Standard is a free version that can satisfy the needs of the majority of users. But if you want more advanced features, you can upgrade to its advanced edition AOMEI Backupper Professional. If you are using a server-based operating system, you can use AOMEI Backupper Server.
How to automatically sync files in Windows 7/8/10?
Step 1. Download AOMEI Backupper Standard, install and launch it.
Step 2. Click Backup and File Sync.
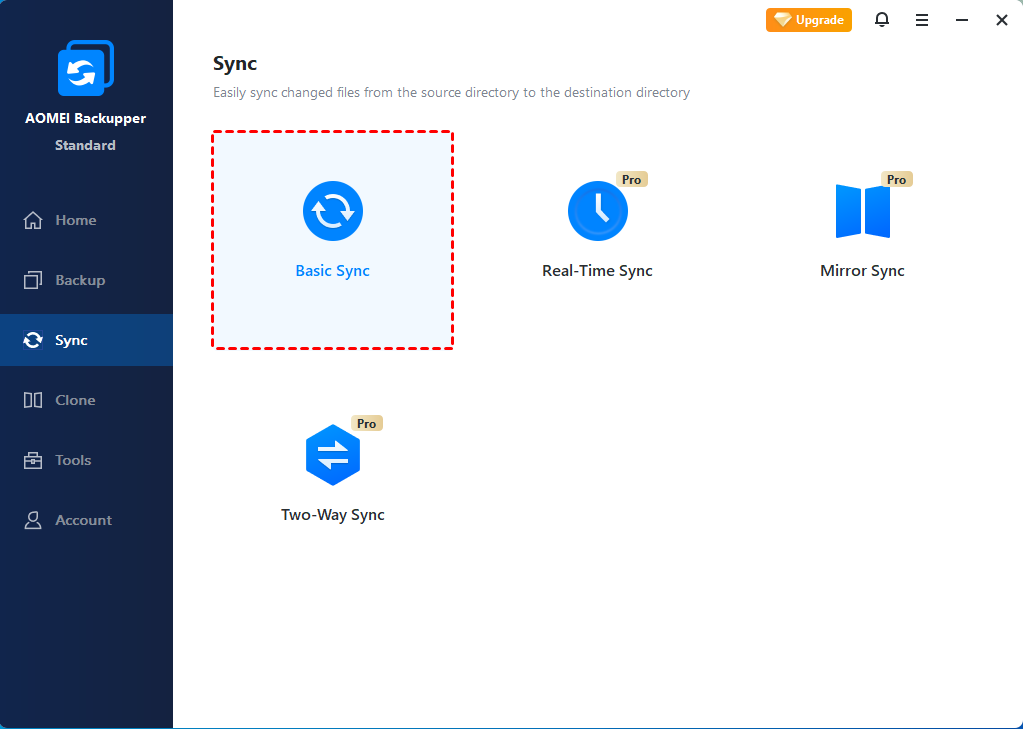
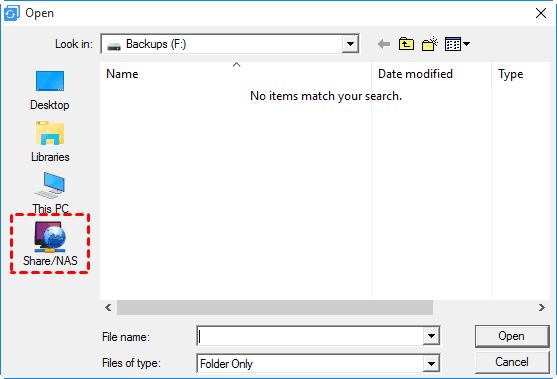
Step 3. Click Add folder > Share/NAS to find the files or folders you want to sync to your computer. After that, you can choose a destination path for your files.
Step 4. Set up schedule setting for your files.
Step 5. Back to the main page of File Sync window, then click Start Sync.
Conclusion
To sync offline files, the first thing is to enable offline files in Windows 10. Then, you can choose how to sync files. You can use either Offline Files folder or Sync Center.
If you want to not only sync files between a local computer and network drive but also sync files to other devices, such as, local computer, network drive, cloud drive like Google Drive, Dropbox, NAS, you can use free AOMEI Backupper, which can help you sync files to all kinds of devices without effort. Also, you can enjoy some features in this software, including Sync Options, Sync Schedule.