Quick Reference:
Monitor sign-in and audit logs
Organizations should monitor sign-in and audit log activity from the emergency accounts and trigger notifications to other administrators. When you monitor the activity on break glass accounts, you can verify these accounts are only used for testing or actual emergencies. You can use Azure Log Analytics to monitor the sign-in logs and trigger email and SMS alerts to your admins whenever break glass accounts sign in.
Obtain Object IDs of the break glass accounts
- Sign in to the Microsoft Entra admin center as at least a User Administrator.
- Browse to Identity > Users > All users.
- Search for the break-glass account and select the user’s name.
- Copy and save the Object ID attribute so that you can use it later.
- Repeat previous steps for second break-glass account.
Create an alert rule
- Sign in to the Azure portal as at least a Monitoring Contributor.
- Browse to Monitor > Log Analytics workspaces.
- Select a workspace.
- In your workspace, select Alerts > New alert rule.
- Under Resource, verify that the subscription is the one with which you want to associate the alert rule.
- Under Condition, select Add.
- Select Custom log search under Signal name.
- Under Search query, enter the following query, inserting the object IDs of the two break glass accounts. NoteFor each additional break glass account you want to include, add another “or UserId == “ObjectGuid”” to the
- query.Sample queries:
// Search for a single Object ID (UserID)
SigninLogs
| project UserId
| where UserId == “f66e7317-2ad4-41e9-8238-3acf413f7448”
// Search for multiple Object IDs (UserIds)
SigninLogs
| project UserId
| where UserId == “f66e7317-2ad4-41e9-8238-3acf413f7448” or UserId == “0383eb26-1cbc-4be7-97fd-e8a0d8f4e62b”
// Search for a single UserPrincipalName
SigninLogs
| project UserPrincipalName
| where UserPrincipalName == “[email protected]”
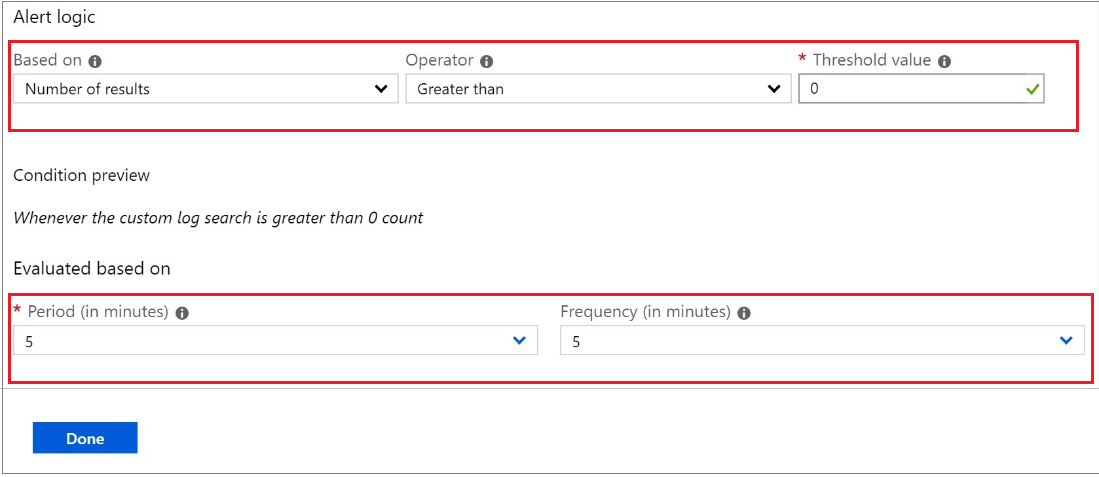
- Under Alert logic, enter the following:
- Based on: Number of results
- Operator: Greater than
- Threshold value: 0
- Under Evaluated based on, select the Period (in minutes) for how long you want the query to run, and the Frequency (in minutes) for how often you want the query to run. The frequency should be less than or equal to the period.

- Select Done. You may now view the estimated monthly cost of this alert.
- Select an action group of users to be notified by the alert. If you want to create one, see Create an action group.
- To customize the email notification sent to the members of the action group, select actions under Customize Actions.
- Under Alert Details, specify the alert rule name and add an optional description.
- Set the Severity level of the event. We recommend that you set it to Critical(Sev 0).
- Under Enable rule upon creation, leave it set as yes.
- To turn off alerts for a while, select the Suppress Alerts check box and enter the wait duration before alerting again, and then select Save.
- Click Create alert rule.
Create an action group
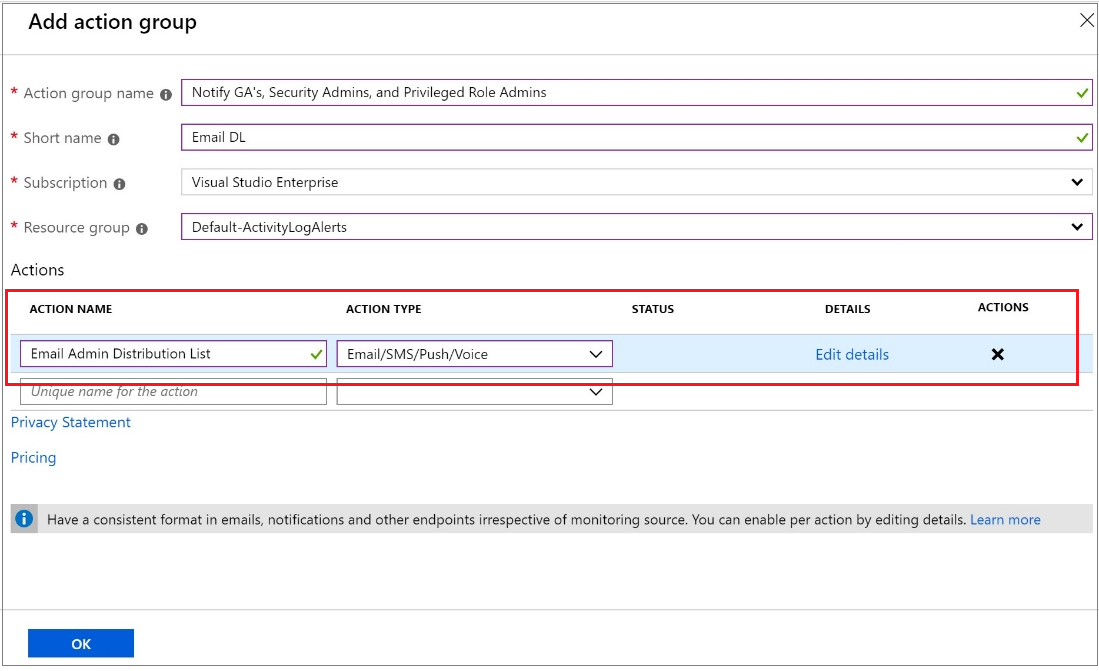
- Select Create an action group.

- Enter the action group name and a short name.
- Verify the subscription and resource group.
- Under action type, select Email/SMS/Push/Voice.
- Enter an action name such as Notify Global Administrator.
- Select the Action Type as Email/SMS/Push/Voice.
- Select Edit details to select the notification methods you want to configure and enter the required contact information, and then select Ok to save the details.
- Add any additional actions you want to trigger.
- Select OK.
Ref: Manage emergency access admin accounts – Microsoft Entra ID | Microsoft Learn