Note: If your device/service supports SHA256 and DH group 14, it is recommended to use these settings instead.
Configuring the tunnel in the Palo Alto WebGUI
- Open the Palo Alto WebGUI, and select the Network tab
- Select Interfaces and open the Tunnel tab
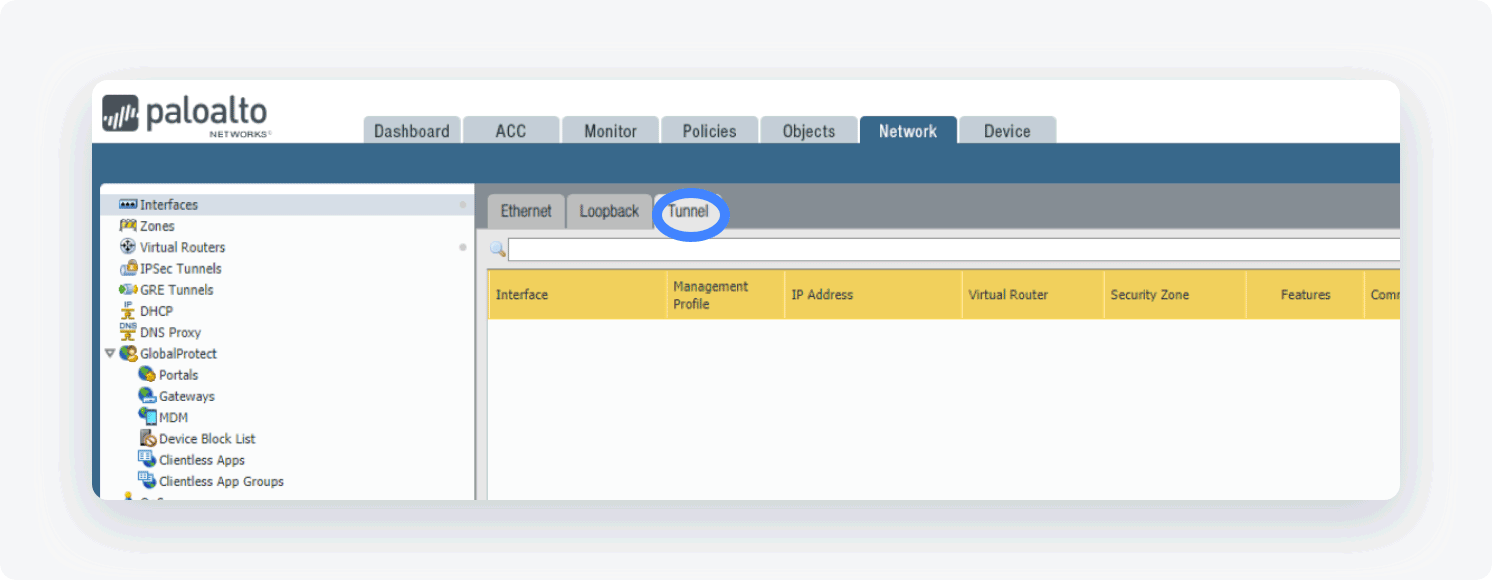
- Click Add

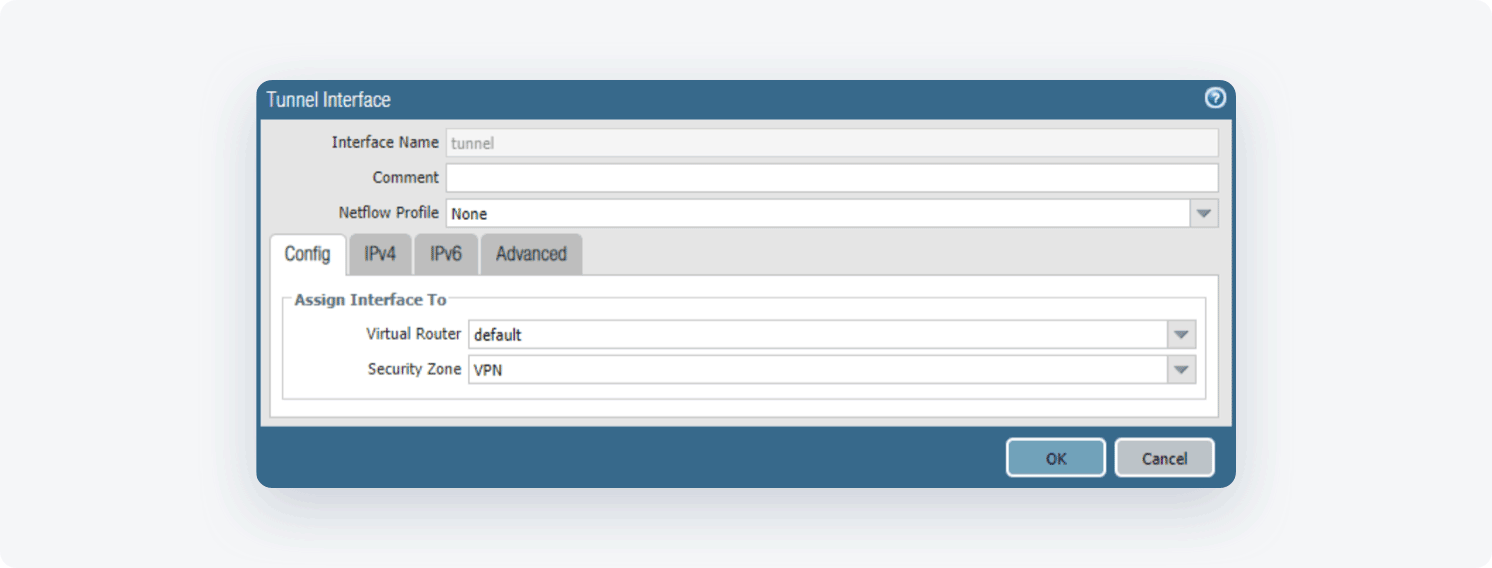
- Assign the parameters with the following information
- Virtual Router: Select the virtual router you would like your tunnel interface to reside in.
- Security Zone: Configure a new zone for the tunnel interface for more granular control of traffic ingress/egressing the tunnel. If the tunnel interface is in a zone different from the zone where the traffic will originate or depart, then a policy is required to allow the traffic to flow from the source zone to the zone containing the tunnel interface.
- Open the Network tab
- Select Network Profiles and go to IKE Crypto
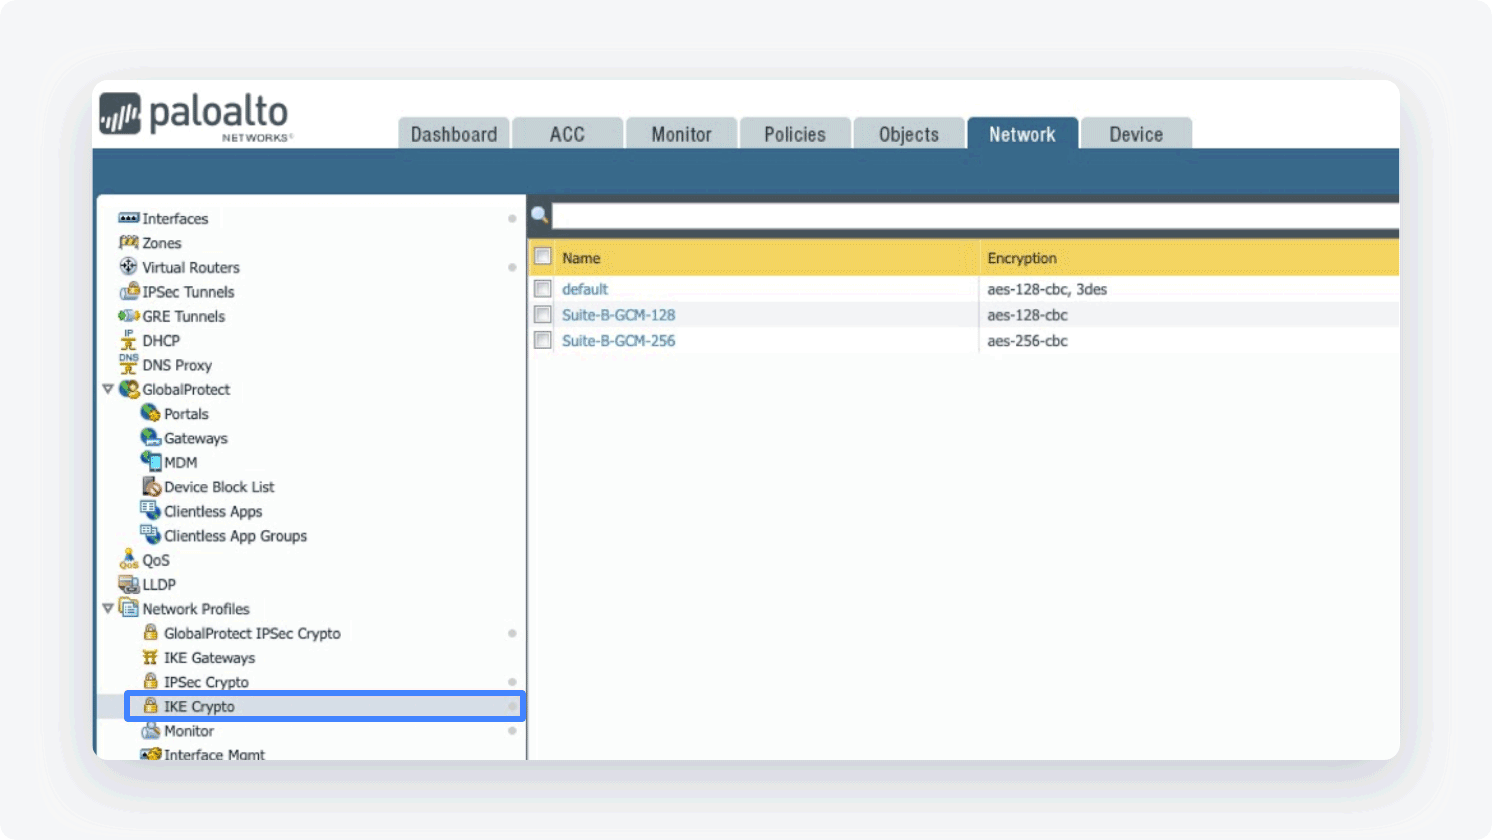
- Click Add (at the bottom of the page) and define the IKE Crypto profile (IKEv1 Phase-1) parameters
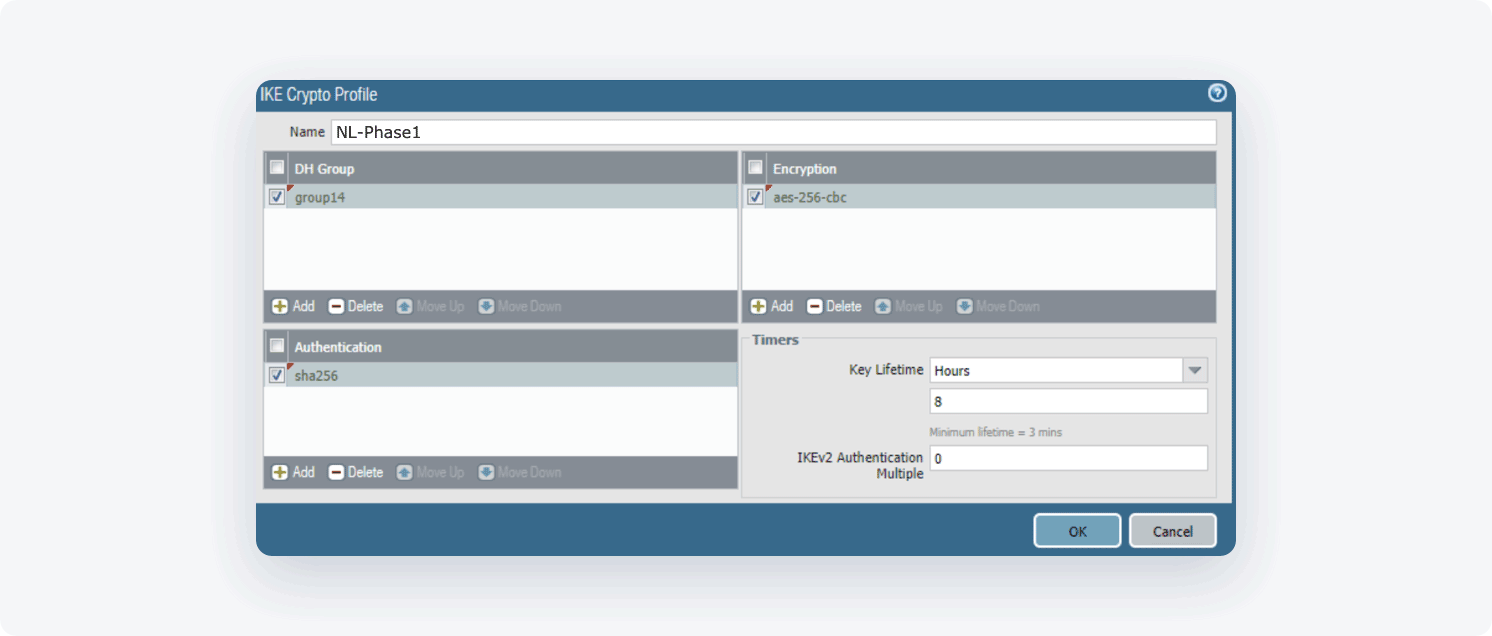
- Name: Choose the name of your own choice.
- DH Group: 14
- Encryption: aes-256-cbc
- Authentication: sha256
- Key Lifetime: 1 Hour
- IKEv2 Authentication Multiple: 0
- Open the Network tab. Select Network Profiles and go to IKE Gateway
- Select Add and fill in the following information:
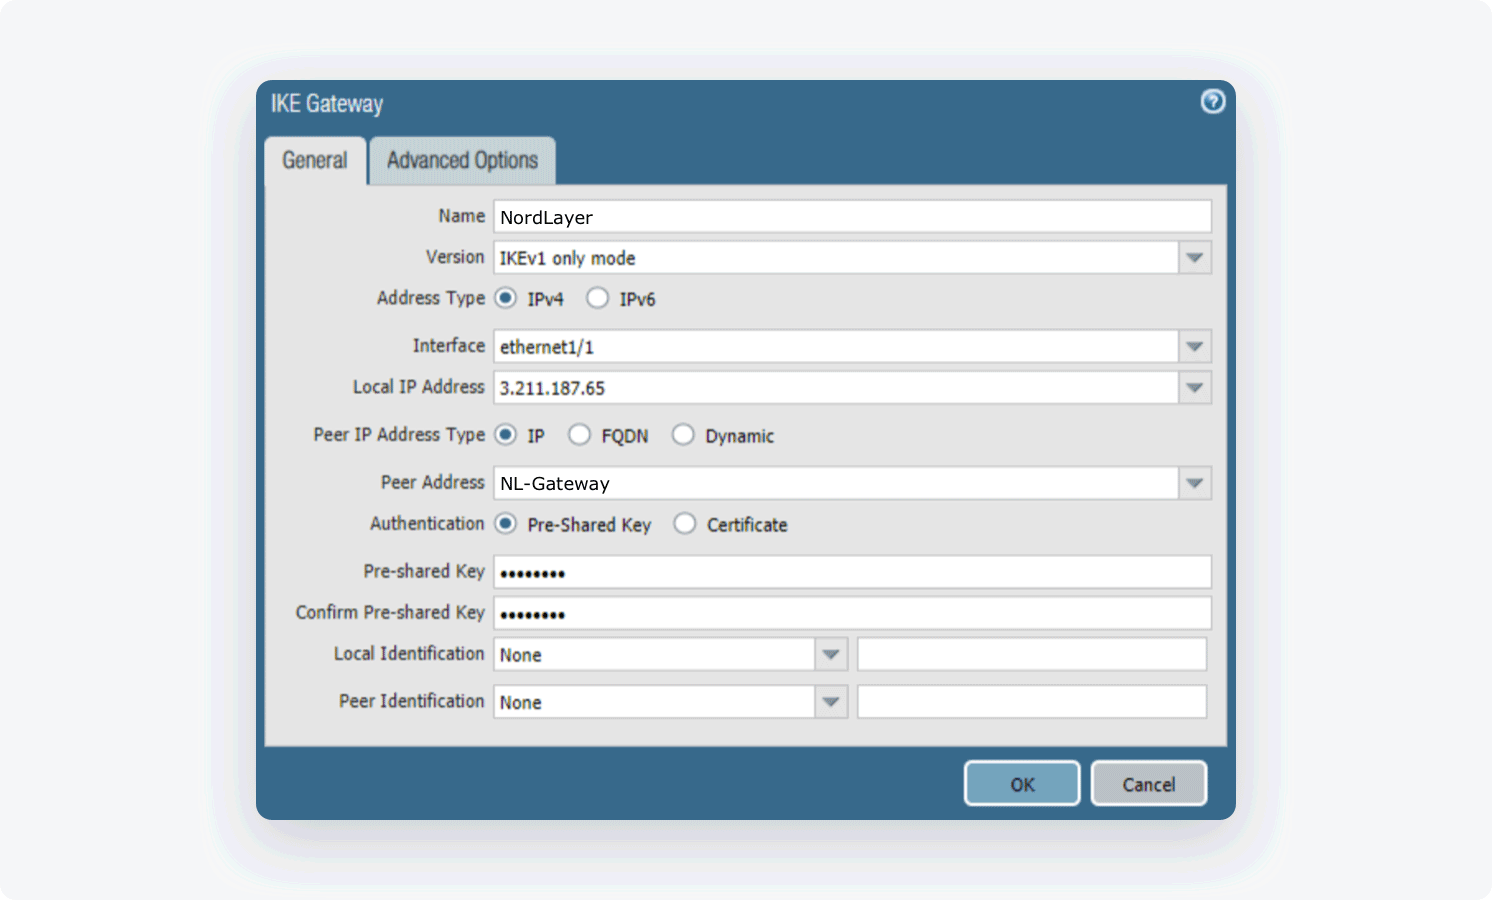
- Name: Choose the name of your own choice
- Version: IKEv1 (IKEv2 recommended)
- Address Type: IPv4
- Interface: The external interface connected to the internet
- Local IP Address: Choose the external IP address
- Peer IP Address Type: IP
- Peer Address: the IP of your NordLayer dedicated server
- Authentication: Pre-Shared Key
- Pre-Shared Key: Enter a string of your own choice containing lower-case characters, upper-case characters, and a number. Please write down this value as we will also need this value on our end.
- Local Identification: None (the gateway will use the local IP as the local identification value)
- Peer Identification: None (the gateway will use the peer IP as the peer identification value)
- Open the Network tab. Select Network Profiles and go to IPSec Crypto
- Select Add and fill in the following information:
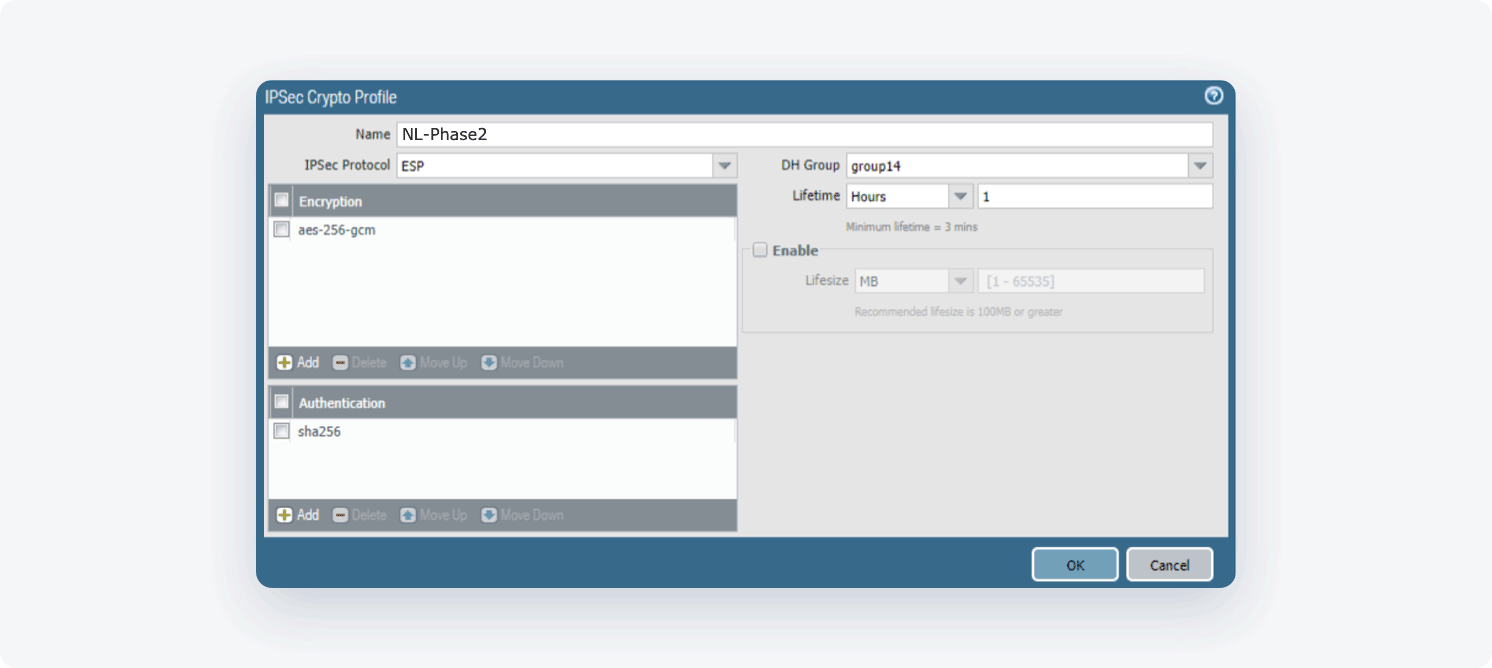
- Name: NordLayer-Phase2
- IPSec Protocol: ESP
- DH Group: 14
- Encryption: aes-256-cbc
- Lifetime: 8 Hours
- Authentication: sha256
- Open the Network tab. Select IPSec Tunnels, then Add and fill in the following information:
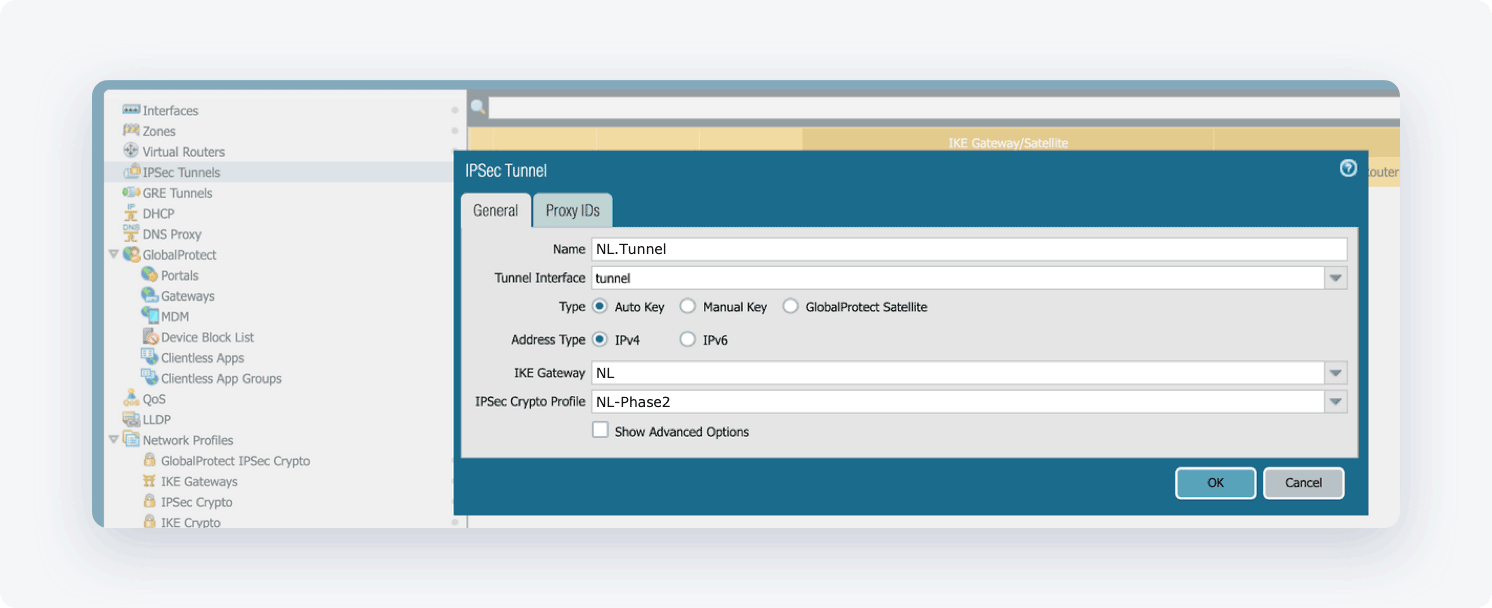
- Name: Choose the name of your own choice
- Tunnel Interface: Choose the appropriate interface
- Type: Auto Key
- Address Type: IPv4
- IKE Gateway: Choose the gateway that was defined earlier
- IPSec Crypto Profile: Choose the profile that was defined earlier
- Add Proxy IDs Below, please see a sample.

- Open the Network tab
- Select Virtual Routers, then select Static Routes and click Add. Fill in the following information:
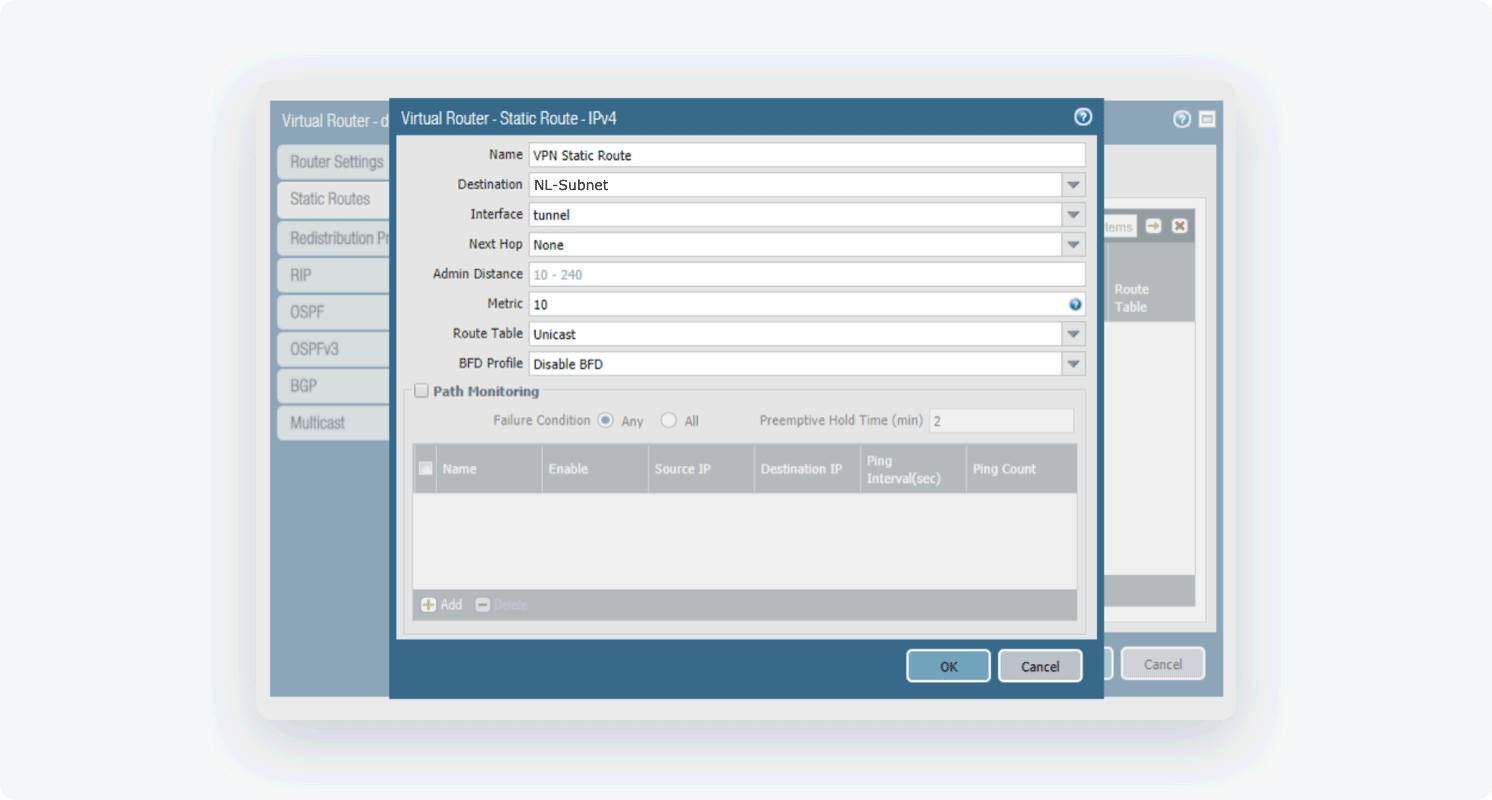
- Name: Choose the name of your own choice
- Destination: 10.6.0.0/20 (if such an object does not exist yet make sure to define it)
- Interface: Choose the appropriate interface
- Next Hop: None
- Metric: 10
- Route Table: Unicast
- BFD Profile: Disable BFD
- Open the Policies tab and select Security

By default, IKE negotiation and IPSec/ESP packets are allowed.

- If you see somewhat differently or if you wish to have more granular traffic control, select ADD, and create an appropriate rule
Ending note:
In order to finalize the site-to-site setup on our end, please provide these values via Site-to-site request from in the NordLayer Control Panel:
- Pre-shared key – you can generate it or we can provide it
- Encryption details (AES, SHA and DH group) – AES256, SHA256 and DH group 14 are recommended (also must support IKEv2)
- Remote gateway/router public IP (must be reachable while connected to the dedicated server)
- Remote subnet and mask (the subnet is used in your local network)