Nothing is more frustrating than when a program locks up—and stops responding—for no apparent reason. You can protect your work from these events by using the AutoRecover feature to periodically save a temporary copy of the project you’re working on.
Modify Recovery Settings
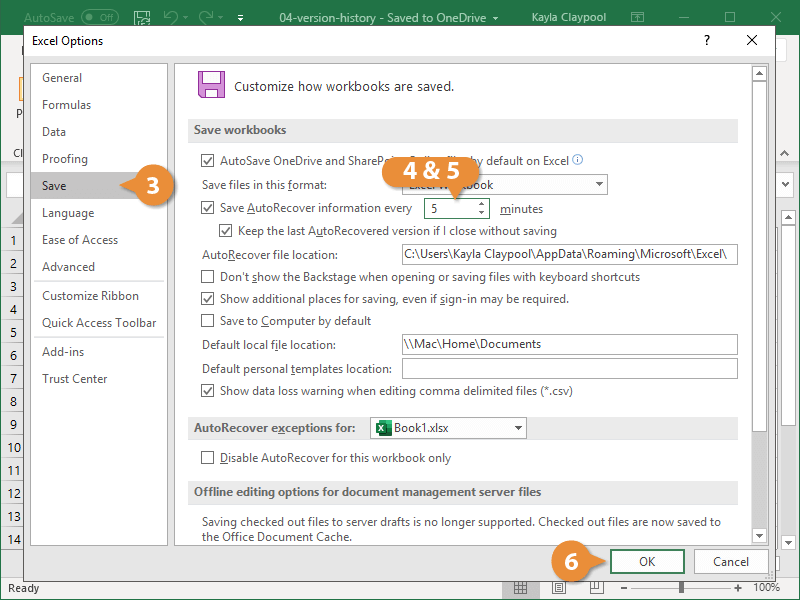
When the AutoRecover feature is enabled, a backup copy of the workbook is saved every 10 minutes (its default setting). However, you can change the AutoRecover save interval to occur more or less frequently.
- Click the File tab.

- Click Options.
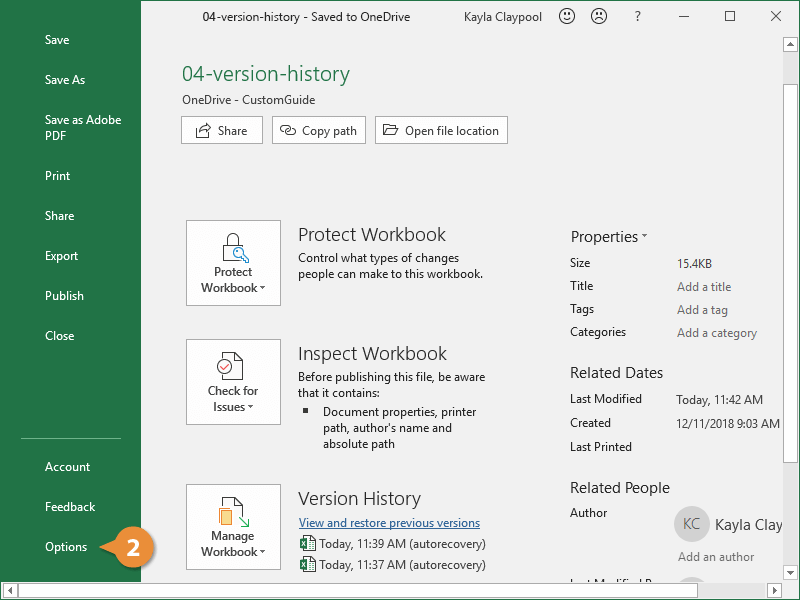 The Excel Options dialog box appears.
 - Click Save.
- Click in the Minutes field.
- Enter a value for how frequently you’d like to save AutoRecover information.
- Click OK.
Even with Excel’s document recovery features, the best way to ensure that you don’t lose much information if your computer freezes up is to save your work regularly.
Recover Unsaved Workbook Versions
If AutoRecover is enabled in Excel, you don’t have to do anything to make it work. Any available unsaved versions can be found in the Backstage view.
- Click the File tab.

- If needed, scroll to the Version history section.
- Select an autosaved version of the file in the list of recovered files.
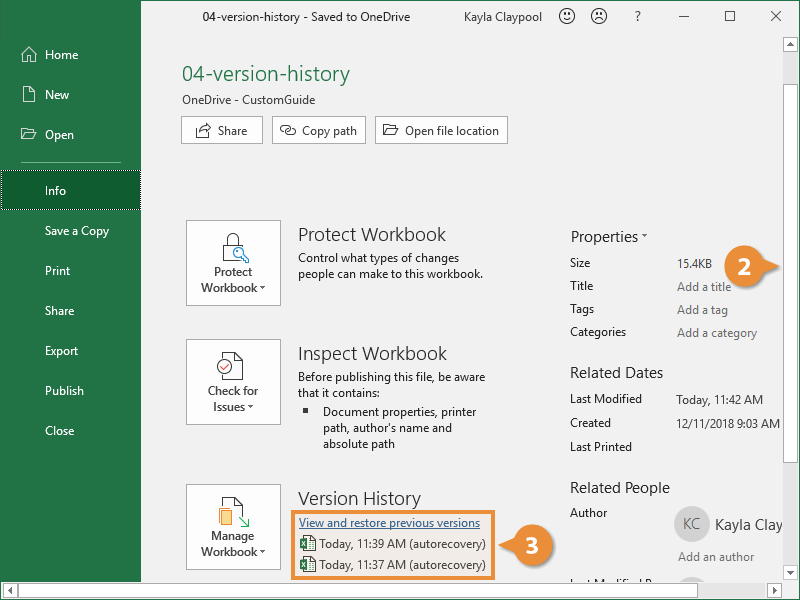 If the version you need to recover isn’t in the recent list, click the Manage Workbook button and select Recover Unsaved Workbooks to see if the version you need is saved there.The previous version of the file opens. At the top, you see a notification that this is an AutoSaved version.
The file is restored to the previous version.
Online Version History
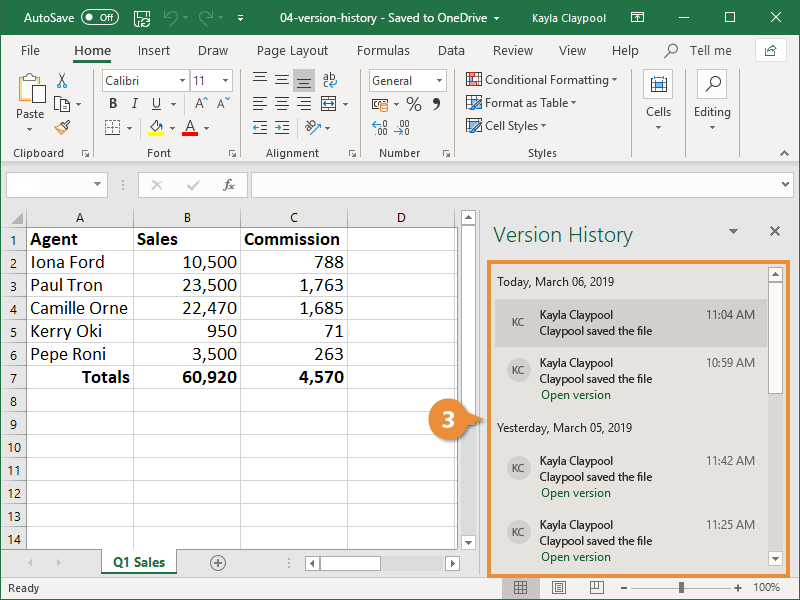
If this is a file that’s saved online, there’s another way to view version history.
- Click the Title Bar button.
- Select Version History.
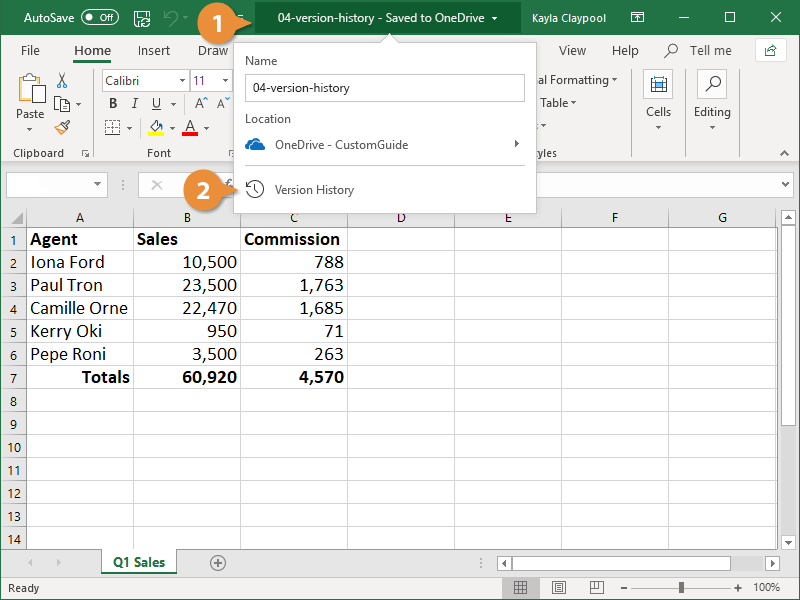 Here you see all the changes that have been made to the file, either by you or anyone the file is shared with.
 - Click Open version for the file you want to restore.
- Save an additional copy of the file or click the Restore button.
Ref: https://www.customguide.com/excel/restore-previous-version-of-excel-file