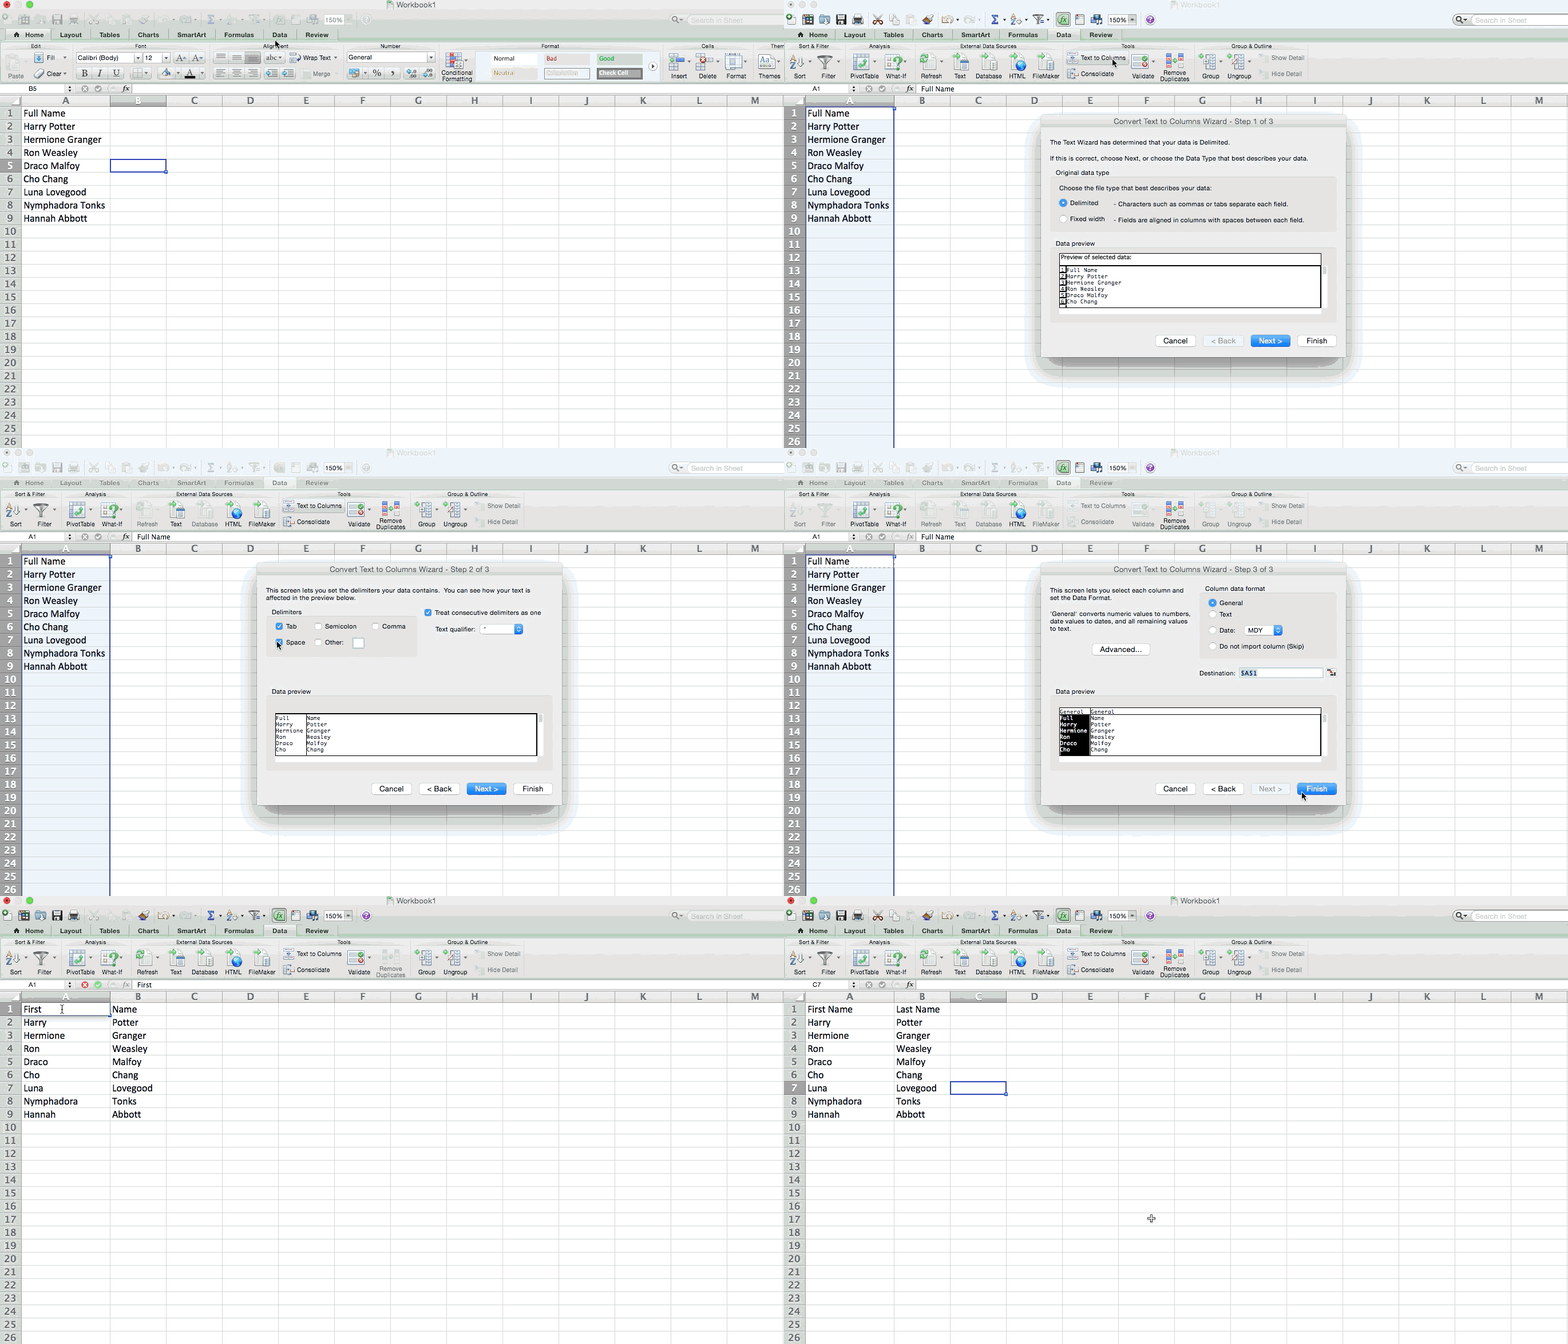
What if you want to split out information that’s in one cell into two different cells? For example, maybe you want to pull out someone’s company name through their email address. Or perhaps you want to separate someone’s full name into a first and last name for your email marketing templates.
Thanks to Excel, both are possible. First, highlight the column that you want to split up. Next, go to the Data tab and select “Text to Columns.” A module will appear with additional information.
First, you need to select either “Delimited” or “Fixed Width.”
- “Delimited” means you want to break up the column based on characters such as commas, spaces, or tabs.
- “Fixed Width” means you want to select the exact location on all the columns that you want the split to occur.
In the example case below, let’s select “Delimited” so we can separate the full name into first name and last name.
Then, it’s time to choose the Delimiters. This could be a tab, semi-colon, comma, space, or something else. (“Something else” could be the “@” sign used in an email address, for example.) In our example, let’s choose the space. Excel will then show you a preview of what your new columns will look like.
When you’re happy with the preview, press “Next.” This page will allow you to select Advanced Formats if you choose to. When you’re done, click “Finish.”

Ref: https://blog.hubspot.com/marketing/how-to-use-excel-tips